
Open WebUI: User-Friendly interface for AI chat interactions (Ollama)
Building an Intuitive Front-End for interacting with LLMs Using Open WebUI

Are you looking for an easy-to-use interface to improve your language model application? Or maybe you want a fun project to work on in your free time by creating a nice UI for your custom LLM. Whatever your reasons, this post will help you develop a simple and attractive interface using OpenWebUI that makes using these powerful AI models even better. At the end of this blog, you'll have created an intuitive, user-friendly interface that is feature-rich to chat with LLMs. You can use your own custom-trained LLM, open-source models, or even OpenAI's GPT models.
OpenWebUI, formerly called Ollama WebUI, is an open-source, easy-to-use web interface that runs locally on your own machine. It works with different language model tools, like Ollama and APIs that are compatible with OpenAI. This combination provides a versatile platform for interacting with a wide range of language models while maintaining privacy and control over your data.
Note: Ollama vs. Open WebUI
Install Open Web UI using a Docker image (macOS)
Download Docker from its official website. For macOS, Docker offers two versions: one for Intel chips and another for Apple's M-series chips.
You can install Ollama and Open Web UI together. Since I already have Ollama [download Ollama here] installed, the next thing we'll do is install Open Web UI using a Docker image.
For that, we’ll run the following command in the terminal.
docker run -d -p 3000:8080 --add-host=host.docker.internal:host-gateway -v open-webui:/app/backend/data --name open-webui --restart always ghcr.io/open-webui/open-webui:mainAfter you run the command in the terminal, you'll see the output below, and Open WebUI should be up and running at http://localhost:3000

docker pscommandshows all the Docker containers currently running on your computer. It tells you details like the container ID, the image it's based on, the command it's running, when it was created, its current status, any ports it's using, and its name.

Next, go ahead and sign up for Open WebUI to create your account!

Now you can explore the fantastic UI features of Open WebUI. Before we move on, take a moment to check out the features of the UI yourself.

OpenAI API
Now, log in to your OpenAI account and create a new API key if you don't have one yet.

You can name it OpenWebUI so it's easy to remember and make sure it has permissions set to All, copy and paste it somewhere safe for easy access.

Head back to the OpenWebUI interface. You can access Settings either by clicking on the settings icon in the top right corner of the page or by clicking on your name at the bottom left and selecting Settings from there. Then, click on the Connections tab, where you'll find the OpenAI API connection. Add your key there and save it.

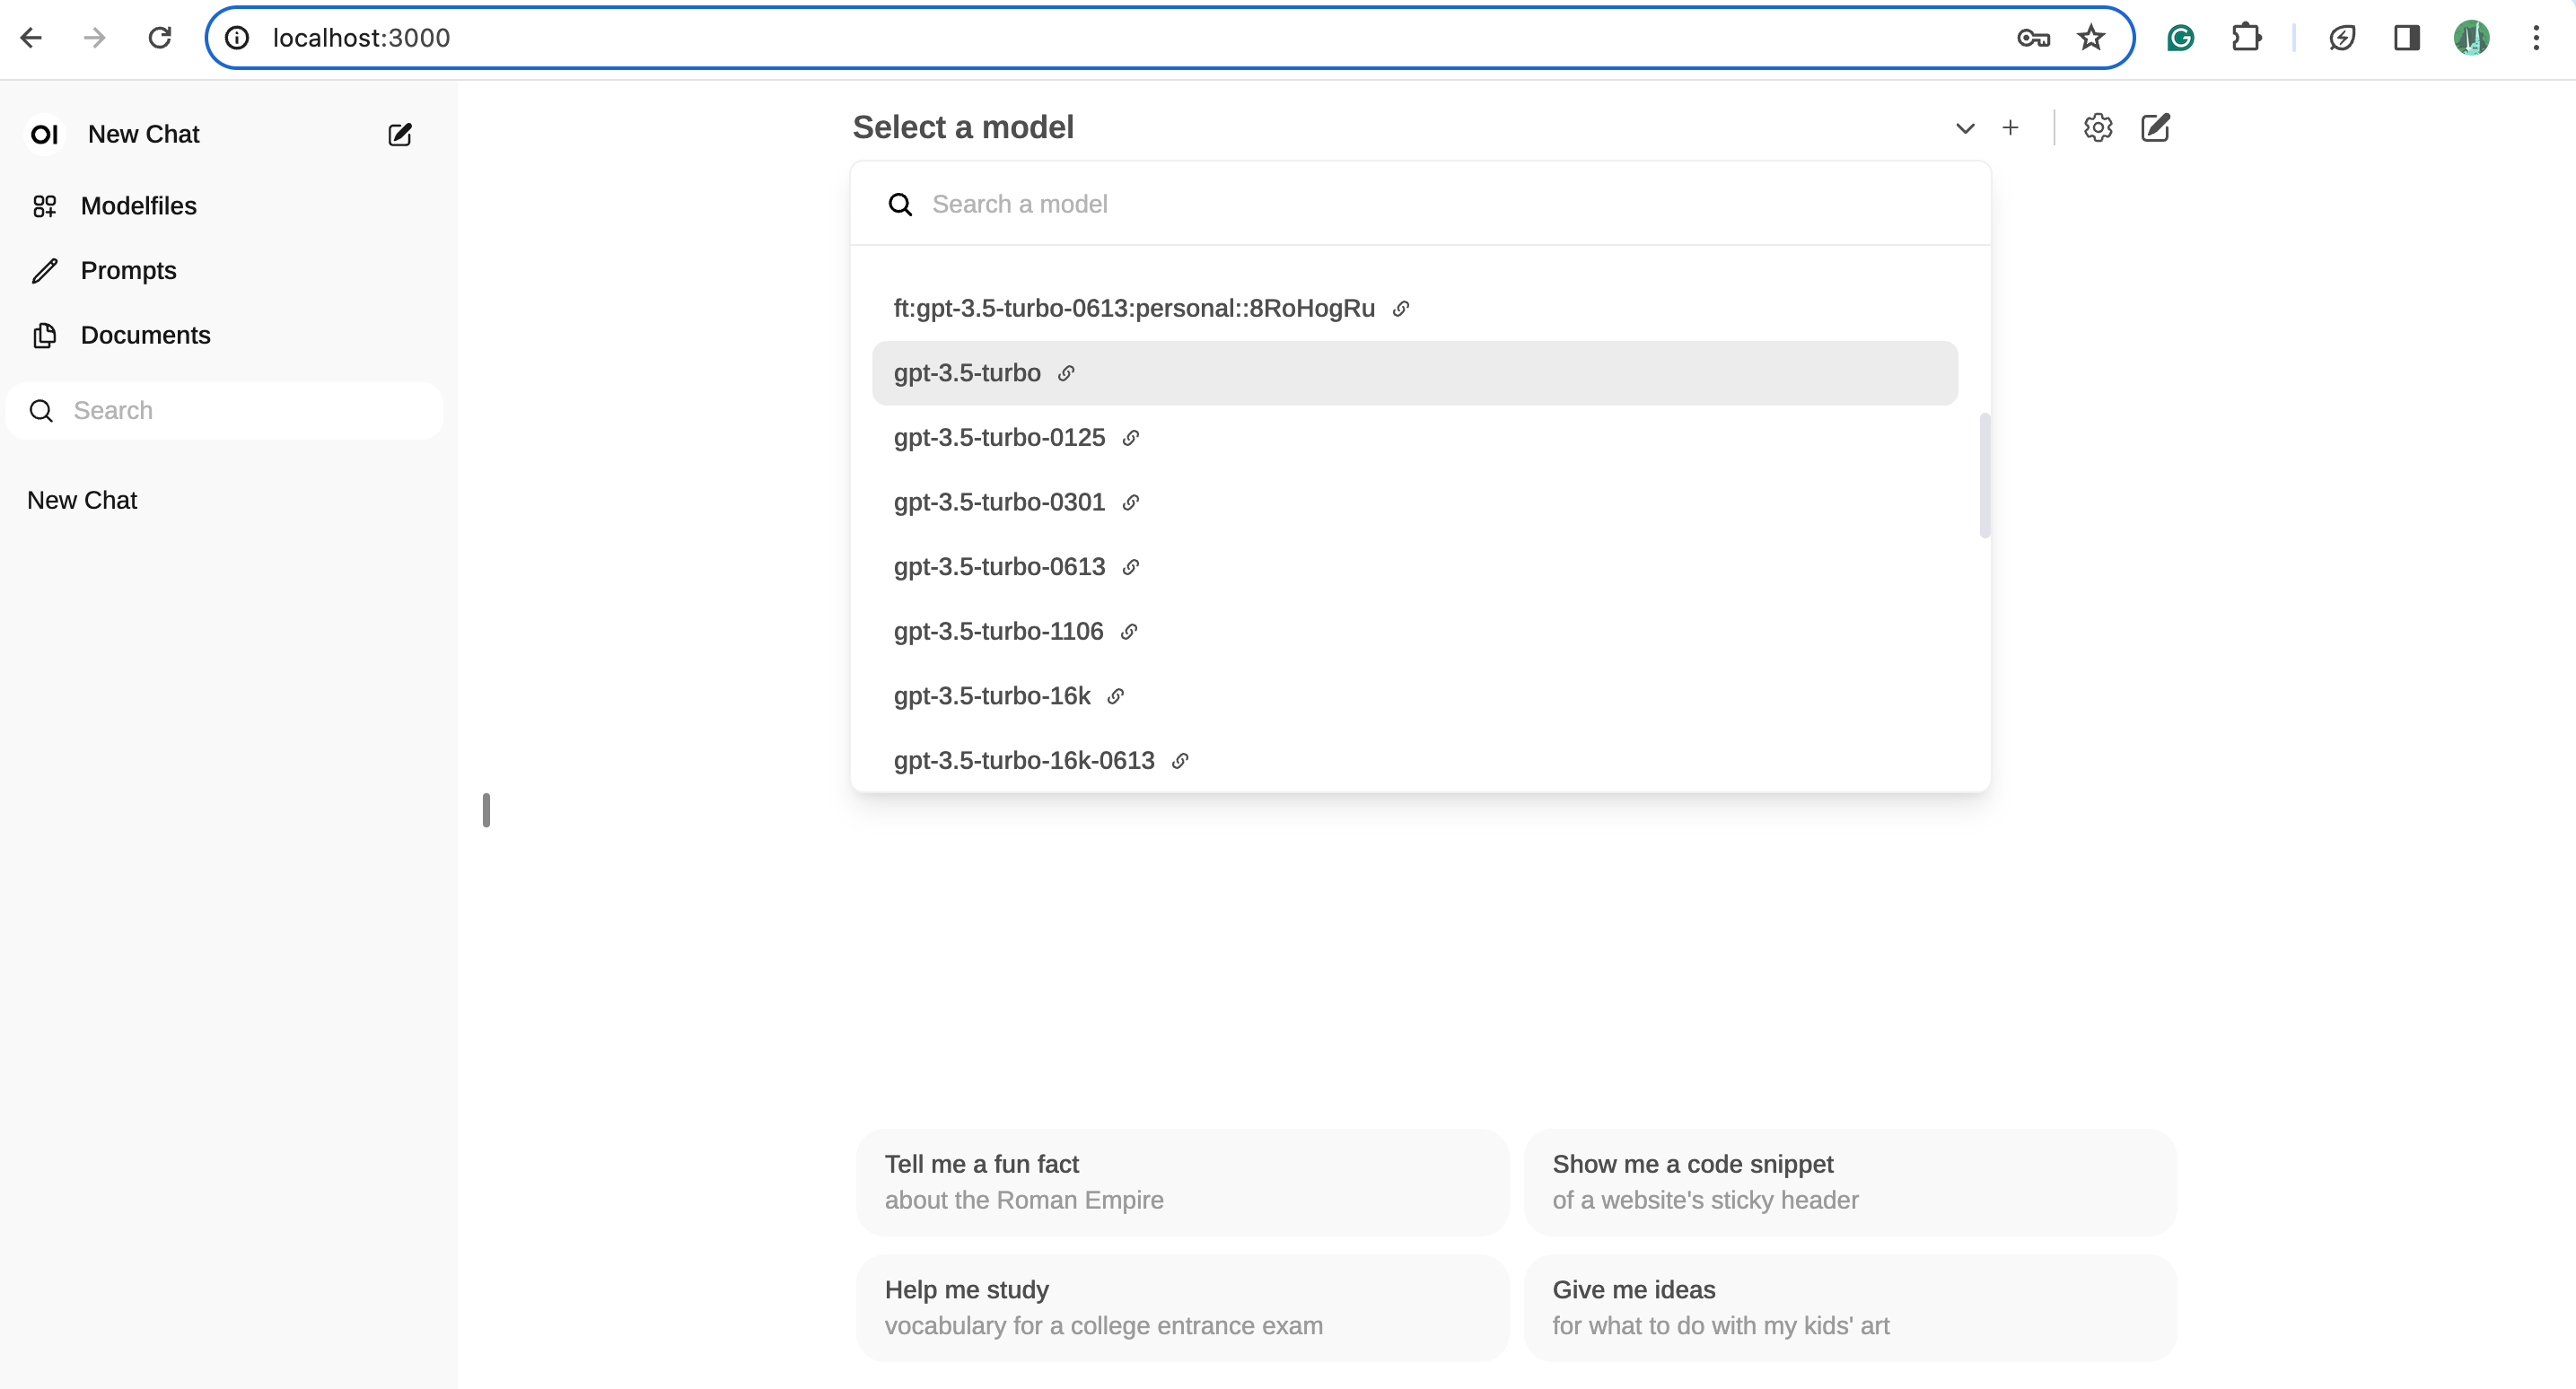
On the main chat interface, at the top, let's select the model we want to interact with. For now, select gpt-3.5-turbo from the model dropdown.
Now, let's click on one of the prompts that's already available on the chat interface to test our connection.

So, we've successfully created an intuitive, user-friendly AI chat interface using OpenWebUI, and it's running the gpt-3.5-turbo API behind the scenes to handle the chatting. If you happen to have your own custom-trained model, you can swap that in and use it instead of the default one.
Ollama
Ollama is a special tool that lets you use powerful language models on your own computer. You can install Ollama and then run models like Llama, Mistral, or Gemma right on your personal machine.
If you haven't installed Ollama yet, go ahead and do that by following the steps shown below. Open up your command line interface and type 'ollama run llama3' to start chatting with the llama3 model. Finish up the setup process.

If your Ollama is running, you should see an option to Pull a model from Ollama.com. To double-check if Ollama is active (Mac), look for the Ollama icon in your top menu bar, like the image shown below.

Next, head over to the OpenWebUI settings menu and select the Models tab. Let's download an open-source model using Ollama. We'll go with the 2 billion parameter version of Gemma, by Google. Download it by typing gemma:2B and load it up. You should be able to see it downloading.
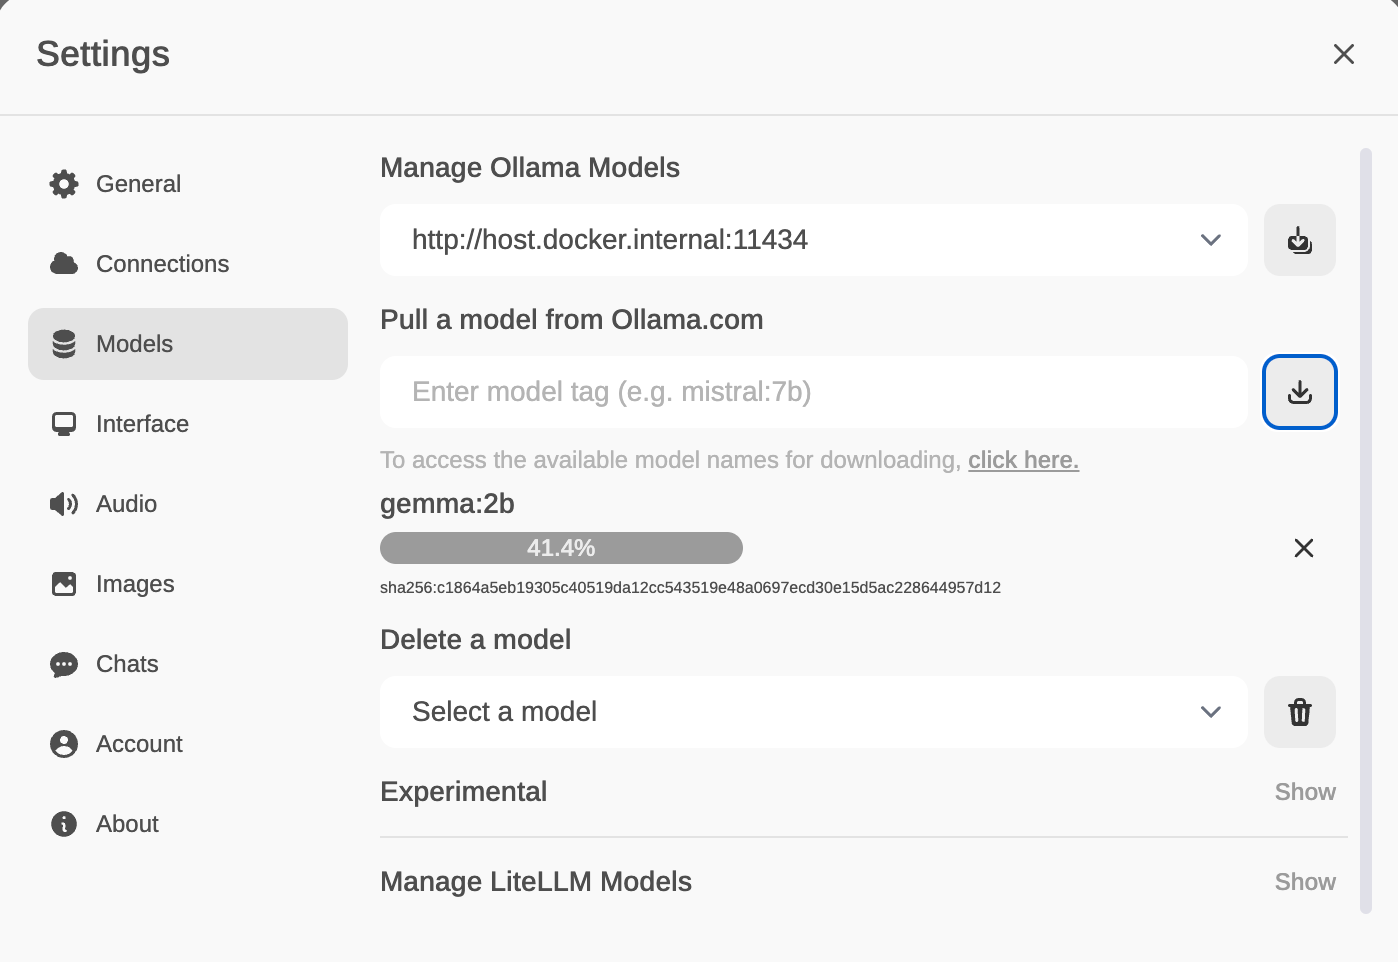
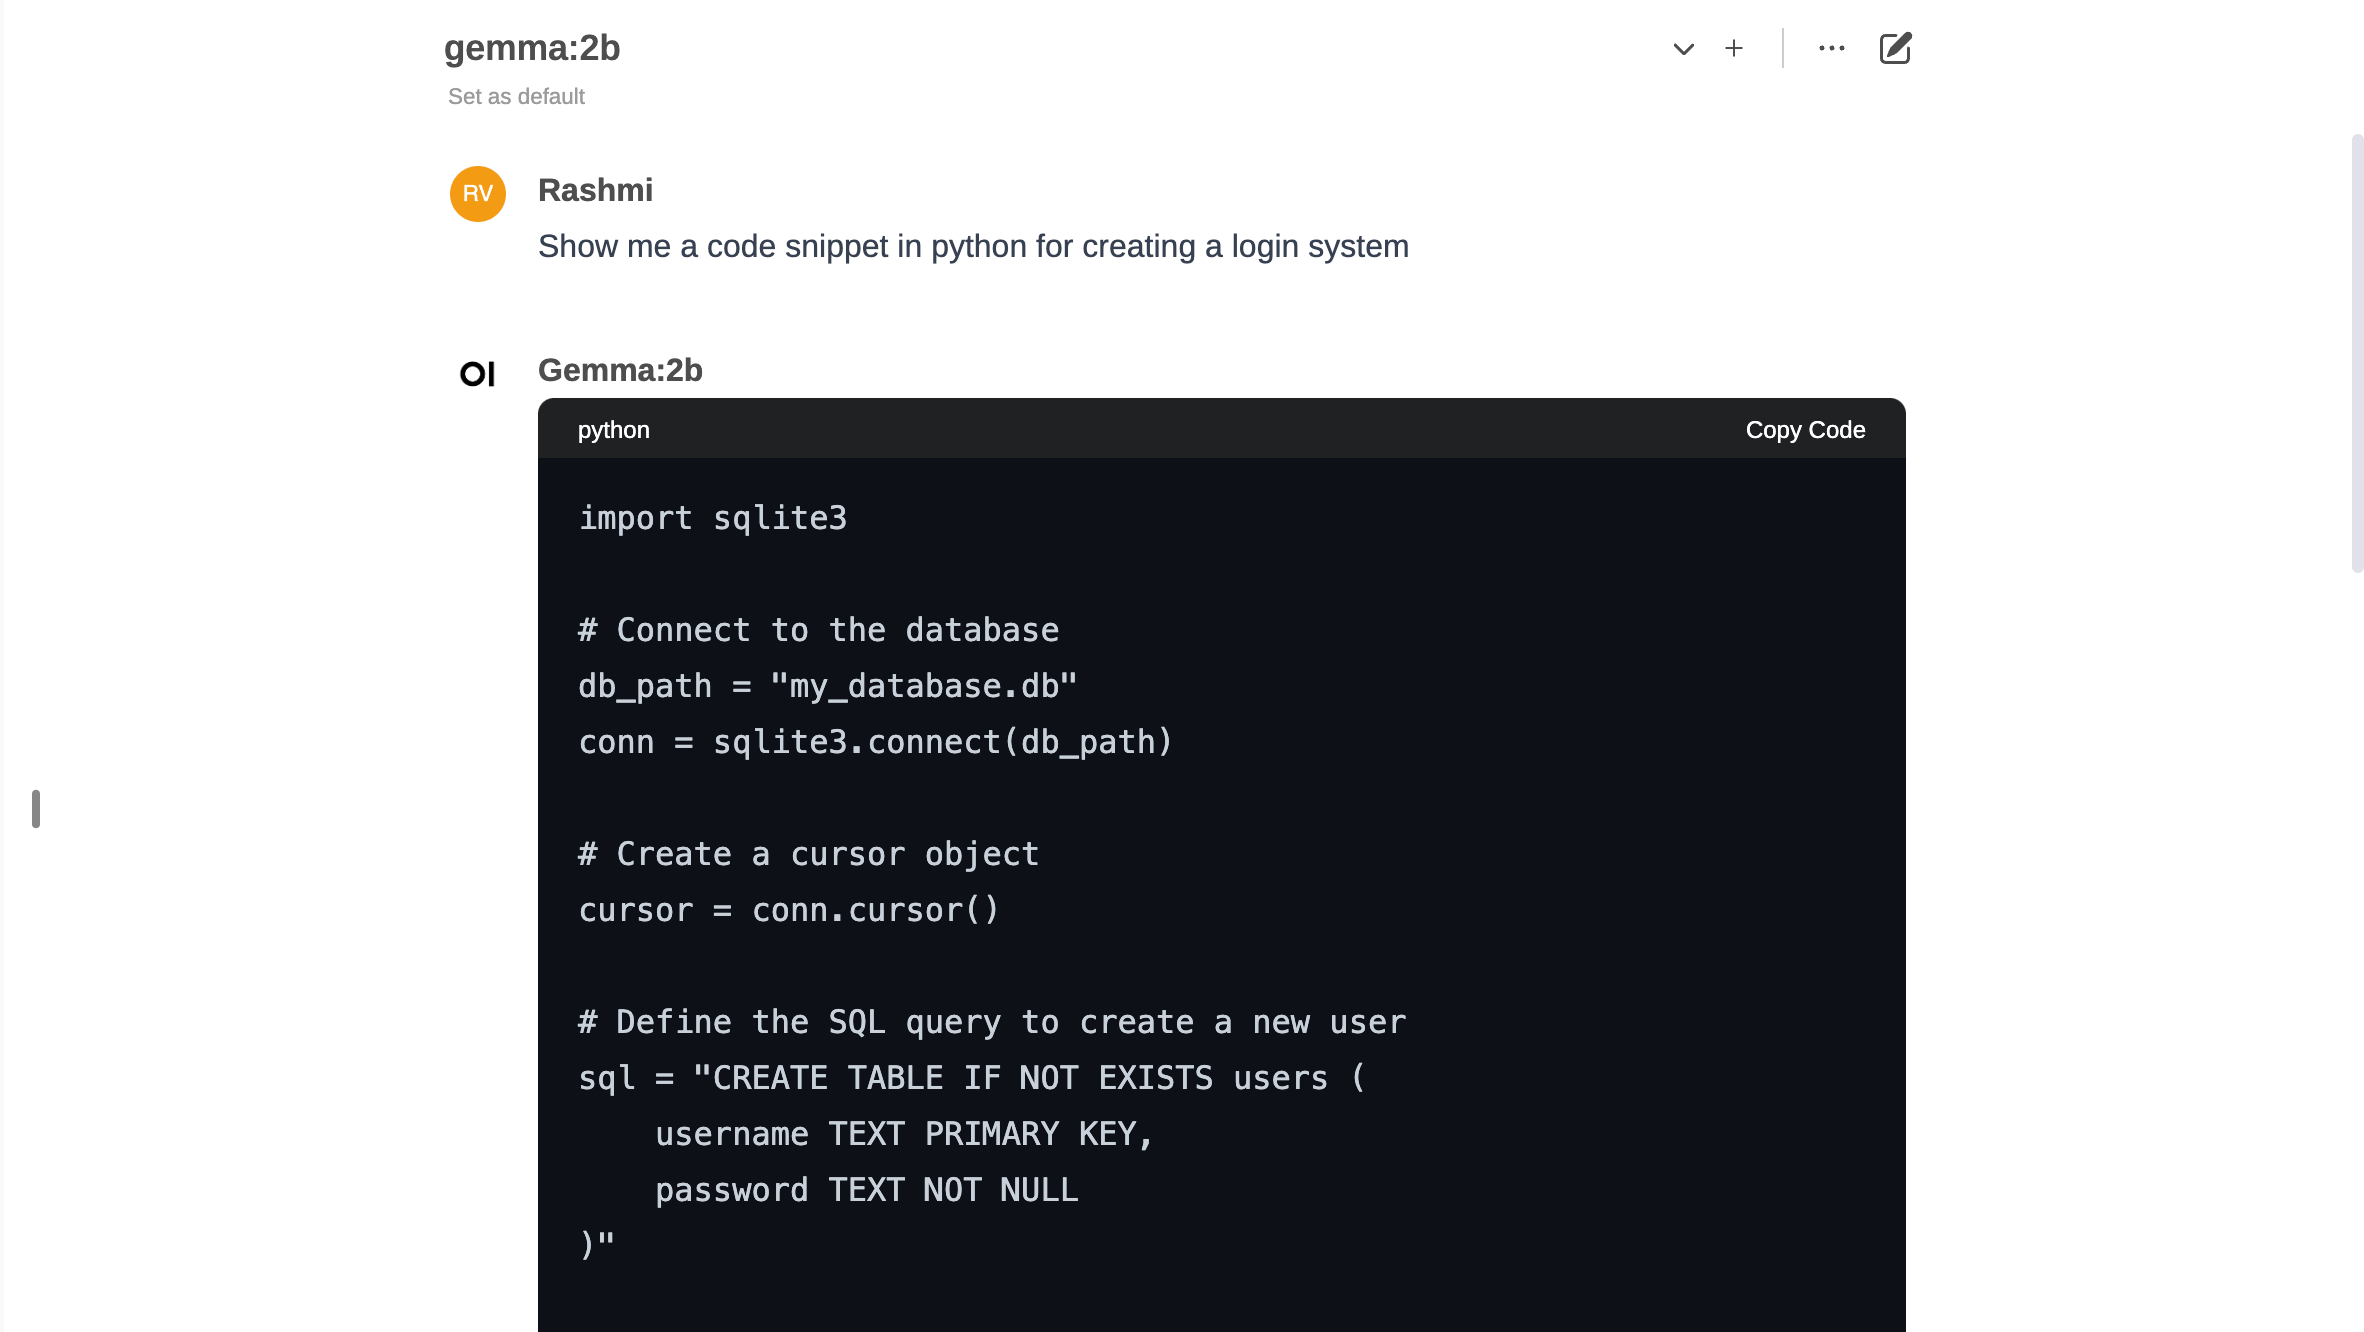
You can also check out what other models are available for download. Once that Gemma model finishes downloading, just head back to the main chat interface go to the model selection drop-down menu, and pick the gemma:2b option from the list. With that selected, you'll be all set to start chatting with the Gemma model.

You can also get rid of any downloaded models from the Models tab.

OpenWebUI offers a multitude of compelling benefits out of the box. It supports seamlessly switching between multiple models to facilitate diverse interactions. Additionally, it features multi-modal support, enabling seamless engagement with models that accommodate multimodal interactions, including images. Check out other cool benefits of OpenWeb UI here.
I hope you enjoyed learning from this post as much as I enjoyed creating it. This marks my debut on Substack, a decision I made after much contemplation. So here's to my first-ever post! If you found it helpful, I'd love to hear your feedback and suggestions for improvement. Consider subscribing to my Substack for more posts like this.
I've decided to publish for free on Substack because I believe learning should be accessible to everyone. However, if you appreciate my work and want to support me, you can buy me a coffee. ☕️
Thank you for your support! 🫶